Assembly Mechanics (Game Mechanics)
| This article or section needs proper wiki formatting. |
Game Mechanics - Assembly Mechanics
SWGANH Wiki is a repository of Star Wars Galaxies Developer information. This site is only meant to be used by SWGANH Developer team.
|
|
Assembly OverviewThere are two factors that go into the process of determining an item's statistics; these are Assembly and Experimentation. Assembly is the starting point of this process. Assembly in its literal sense, is the putting together of the components and resources to create an item. Most crafted items have a set of experimental lines in which have individual properties under them. These properties are a control and bottleneck for the value of the stats that are associated with them. The properties are associated with a particular resource stat and the amount to which that stat weights or factors into the increase/decrease of the stats of this item. The value that gets returned from this process of weighting factors comes in a percentage range from 0 to 100%. The total length of the range between 0 and 100 is determined by the weighting factors of the resources and experimental property. When an item is assembled or experimented on, a portion is added to the range. For every increase in the value in the range beyond 0, the item's stats increases. The process of assembly is to add a starting value to the range up to a maximum of 30%. Experimentation will add onto this base starting value on up to a maximum of 100%. For a closer look at the mathematics behind this process, see the Formulas in Review section below.
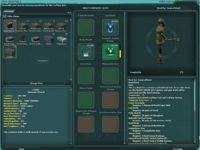
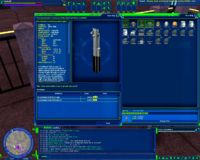
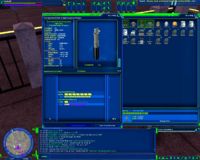
Part I. Assembling the itemAssembling an item begins at stage 2 of the crafting process when the player is inputting resources into the draft schematic slots. After the appropriate slots requirements have met, the player may advance the crafting process by clicking the Assemble button on the lower right. Upon clicking this, the game performs a number of calculations on the item which involved a number of factors such as player skill modifiers, a random chance roll, and environmental effects on the roll. These factors are designed to determine the type of success that the assembly attempt will have produced.
Success with the exception of critical failures, have no bearing on the starting values of the items. The various types of success rates available to assembly results are as follows:
As shown above, Each type of success will vary depending on the success roll made. The only success rate of consequence are Critical Failures. When a critical failure occurs, the player just has to start over on the item. Around march 2005, soe changed the critical failure process so that critical failures no longer destroy resources or components.
Part II. The Assembly Success & Roll DetailedAs mentioned previously, after clicking the assemble button on the crafting menu, a process takes place in which determines the success choice that is displayed to the player. The following will help detail that process.
Result = Rating + Roll Note: for assembly, insert Assembly modifiers for Experiment_Skill. As for points used, assembly has no allocation of points so this presents a problem with the formula for use with assembly.
Roll: Random roll. Rolling below a limit will always give a critical failure regardless of your rating and above another limit will always give amazing success. (Think of it as in RPGs where an original 1 or 20 on 20-sided die overrides your base chance.) Research City, Bespin Port and maybe crafting stations and tools modifies your roll before checking the limits and thus lessens your chance of critical failures. As well as improving your chance for amazing success. (The impact of crafting stations and tools seems to be fairly small if any.)
Risk: This is your chance of getting any kind of failure. Note that the lower results like marginally successful are not technically considered failures even though it feels like it. At zero risk you can no longer get any type of failure except critical from the override on the roll.
50 + (Average_MA - 500)/40 + Experiment_Skill - 5 x Points_Used
If you have 55 in skill, you get 100% with MA 500. At 100 skill you have 145% with MA 500. This means you can only test out the formula at a fairly low skill while the red bar is still there. Once you get 100% you can no longer get any failures, except criticals. But the system considers even marginally successful as a success. As you get higher above 100% the worst type of successes are gradually no longer possible. I believe that if your success rate is high enough, you can't get below great success either. But there are two parts affecting the experiment result and the other one is the experiment roll. The roll is basically a random number which is added to your success rate to give the final result. But the roll has special cases. Like RPGs where a roll of 1 or 20 on d20 will always hit or miss regardless of your base chance. So if the roll is below a certain number, it will force a critical failure, if it's above another number, it will force an amazing success. This ensures you can get amazing with almost no skill and that you can always get a critical. Fortunately things which gives bonus to your rolls are applied before checking for the special cases. Which is why you then get less critical and more amazing results. High enough bonus might theoretically prevent any criticals at all. This means that once you are above 100% (no red bar) you will only get failures from the roll and not from your skill. So things which affects the roll are more important to avoid failures. Like being in a research city or drinking Bespin Port. Both the success rate and the roll matters for getting more amazing successes, but for being able to use more points at once, probably only the skill matters. And there is a possibilty that there is a cap on your skill in this formula. But then you can't use the failure bar to test it out since your skill is too high to even get a red line. A force sensitive master crafter with +25 clothing would have a mean success rate without a cap. The MA is the surprise factor. Having 100 in MA will be just like losing 10 skill points, while 900 in MA is a 10 point bonus. Unfortunately this MA is considered zero if none of the resources have MA effectively giving a -12.5 skill penalty. I strongly suspected Complexity to affect the chance, since it rises as you experiment. But it doesn't affect the chance at all. Also testing with various levels of crafting stations from public to 40+, there is no difference either. But both of them may affect the roll instead. The only way to find out would be to do tons of experiments with the same materials and use statistics. I remember an old post from someone who did this testing, but can't seem to find it again. Anyone with a link ? And being in a research city doesn't affect the success formula either. But that is documented as affecting only the roll, so no surprise there. I have seen noticably better results from rolls in a research city than outside, but haven't done any tests on stations or complexity.
Things that Affect Success Rate and Rolls are:
Roll
Part III. Calculating the Initial PercentageAfter a roll check has been made and a non critical failure success type has been established, the next phase of the assembly process is in calculating the Initial Percentage for the experimentation line.
To begin calculating the initial percentage, several steps must be carried out beginning with finding out the Weighted Resource Average first. The following is a list of steps, in order, that are necessary to achieve the final calculation of the initial percentage.
Part IV. Calculating the Experimentation Line CapThe final affect that assembly has on the experimentation process comes in the determination of the maximum cap, or length, for the experimentation line. The experimentation line can range from 1-10 blocks in which the player can allocate experimentation points into. The size of the line determines the amount of blocks available to experiment. A value of 10% Correlates to 1 experimentation block for a total of 10 at 100%, however fractions come into play here to offer players an allocation method for experimenting when the line is not evenly cut off at the 10ths. For example: a line of experimentation that is at 91% will have 10 blocks and a line at 90% would have 9 available. The extra block is made for the 91% event since the player must a means to allocate the remaining experiment points to max out the line. The line at 90% would be maxed out (if the experiment attempts are success) at 9 points allocated.
To calculate the size of the experimentation line, the following formula is used:
Experimental Damage:
Experimental Damage: 0.85281952055958904109589041095875 % Experimental Efficiency: 0.93981529680753424657534246575325 %
Source References |


